Tuesday 30 May 2023

1Up Arcade Mod: Powering the Cab

The ODROID is recommended 12V 2.5a. The LCD is recommended "same as 1Up power" that is 12V 2.0a. The amp is also 12V 3.0a. However, having multiple transformers (power adapters) just creates heat and cabling mess. Putting in an industrial rectifier is more my style, but not so simple, and I don't need different voltages. And, I learned the hard way, that the amplifier draws more than 2 amps, and the ODROIOD can't satisfy a wifi nub, remote keyboard nub, the 4 port mini hub, and the two joystick/button decoders that in turn power .5 amp worth of button LEDs. I figured I was about 2 amps short of power.


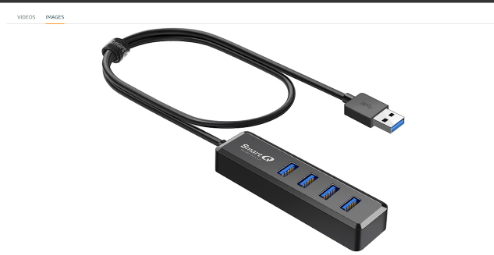
very close to what I had, and I didn't have luck with the independant powered hubs
I replaced the 3' USB A - USB B cables with 1' versions.
So, I found a 12V 10a power supply typically used in home security systems, and a 3 way splitter. I re-used the extension cable for the 1Up. Plenty of juice.


And here is the finished, powered cabinet in use.

Monday 29 May 2023

1Up Arcade Mod: Displays, MAME and X11 Linux

ODROID

I use a 6 core 4G ODROID, with 128G EMMC and 128G SD storage, because its pretty zippy.


Getting the Right Ubuntu

You don't need nor want a lot of Operating System or Windowing overhead if you just want gaming emulation. It makes sense that you want to squeeze every cycle out of your CPU, and not waste them on over-processing. So, because the stock Ubuntu 22 runs on the 4.9 Kernel on ODROID, we have a problem: the Mali GPU driver isn't supported for OpenGL. We need 5.* or later and the Bifrost video drivers. And we want a minimal Window manager - in fact we want a server build (no X11) to start with and only install the minimum amount of XWindows to save on space (and time). And, you really want to use the GPU - not just the framebuffer and software rendering (that is ... slow).

Fortunately, to_better has these linux builds for ODROID. http://docs.linuxfactory.or.kr/ has lots of great advice and images for a server tuned Ubuntu on ODROID. You can grab ubuntu-22.04-server-odroidn2l, and use Etcher on Windows or Linux to write the image to SD CARD or EMMC.
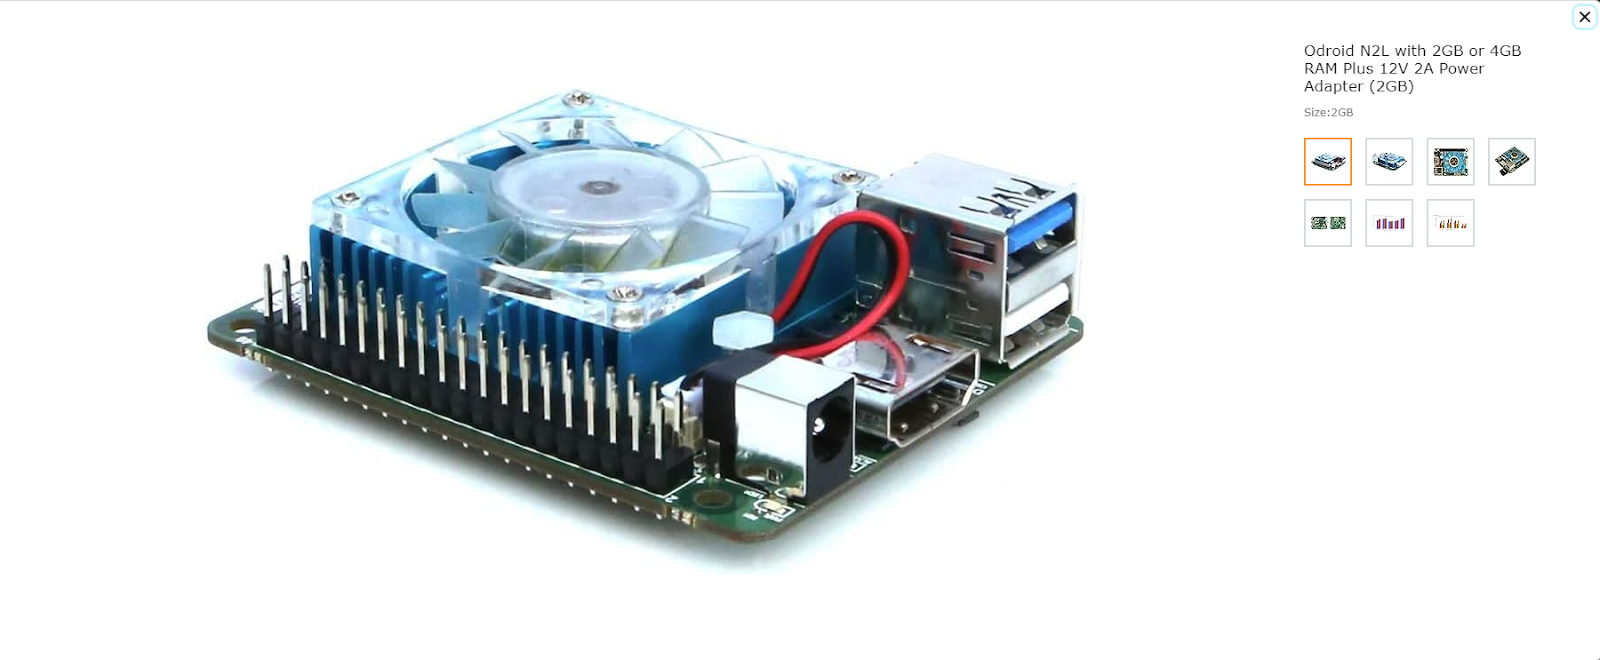
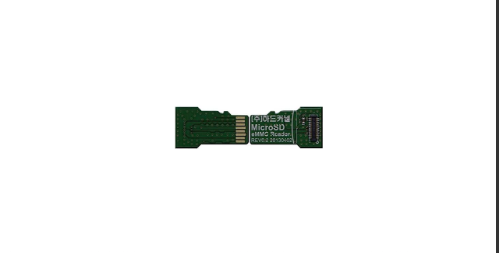
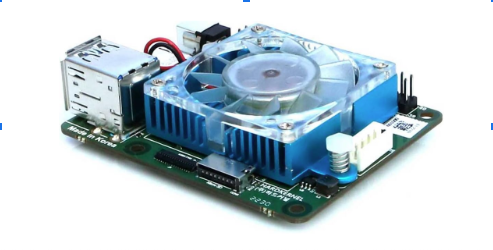
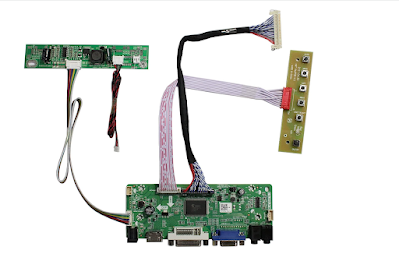
odroid@server:~$ uname -a
Linux server 5.15.0-odroid-arm64 #1 SMP PREEMPT Ubuntu 5.15.110-202305030140~jammy (2023-05-02) aarch64 aarch64 aarch64 GNU/Linux
I wanted a fast disk, so I got the EMMC card from ODROID, but I needed to blast the new image with this cool little adapter:
Note I nerfed my boot EMMC several times, and it is possible to hack the /boot boot.scr file to swap the devno to bootstrap from the EMMC but launch from the SD card. But this is another story... and its easier just to get the EMMC adapter to flash new images / edit files.

Updating the Linux Kernel to Support Rotate

I face a challenge in that the PacMan display is portrait (so height > width). Once I attached the video card, and booted, the world was sideways. Also, the video logic board is in Chinese, so there wasn't a "hardware" configuration change I could see. The folks at HardKernel fixed the kernel to support console rotation ( see the ODROID forum ) - you'd need to install this kernel if you want to rotate the frame buffer.

A Light Weight Window Manager

Once you have your Linux, you can install a light weight Window manager to make life easier should you choose - like I do - to be more than a kiosk. xfce4 should install what you need for bare bones X11.
sudo apt install xserver-xorg-core xfce4
If you just want a kiosk, then some suggest openbox or ratpoison.
The next step is telling X11 you want to be rotated too. After starting xfce4, open your display settings, and select left under rotation. This should stay rotated, but I think there is a glitch somewhere that when screen savers or power savers kick in, the screen will rotate back. It is an issue with xfce4 / window manager as I don't have this issue when I run as a kiosk (described later.)

Building the Emulator Front End and Emulators

Getting into the details of building tools is not here - there are many pages that instruct folks how to build the tools you use. Remember to move your compiled code to a place like /usr/games after executables are compiled. Also, the config files for both MAME and Attract will be in your $HOME directory (as whatever user you work under). Don't run X11 or the these applications as root (but you likely should build them as root.)

You should make sure you turn on swap before compiling and linking MAME, as 4G may not be enough to compile fully with optimization, so I recommend creating an 8G swap.
 sudo fallocate -l 8G /swapfile
 sudo chmod 600 /swapfile
 sudo mkswap /swapfile
 sudo swapon /swapfile
 sudo echo "/swapfile none swap sw 0 0" >> /etc/fstab


Attract

I used attract-2.6.2 aka Attract Mode as my front end because it is simple and easy to configure.

MAME

I used MAME 2.5.4 as my machine emulator. The documentation isn't great for Linux but you can get what you need to compile MAME. Note that MAME on X11 uses Simple DirectMedia Layer (SDL) for input, output, and the MESA OpenGL shim. My makefile turns on the following compile options:
NOWERROR = 1
OSD = sdl
SDLMAME_X11 = 1
OPTIMIZE = 2
TARGETOS = linux
that you can then use with a make -j6 to use all 6 cores (takes a few hours to compile full MAME.)

If you, like me, like to play and optimize code, MAME doesn't do a good job cleaning up after itself, so you will need to do this from the MAME source directory:
make clean
rm -rf `find . -name *.gch -print`
rm -rf `find . -name *.a -print`
  
to prevent "symbol not found" type errors if you fiddle with optimizations and headers.

Autostart to Kiosk, XFCE4 or Shell

There are several ways you can get linux to start an application instead of gettty terminal. I wanted to still log in, but after log in, auto run attract to be a kiosk. So, a .bash_profile is the trick to prompt what to do or timeout and just run attract!
odroid@server:~$ cat .bash_profile
read -t 10 -p "1) shell 2) xfce4 or do nothing and launch as kiosk: " v
if [[ $? -gt 128 ]] ; then
  startx ./headless.sh
else
  case "$v" in
    [1])
      ;; # dont exit as it will quit the shell
    [2])
      startxfce4;;
    *)
      echo "Huh?? I think you mean exit.";;
  esac
fi
This script does on of three things when the user logs in.
  • exit to console shell
  • start xfce4 as a Window Manager
  • just launch attract without a Window Manager under X11 if the user doesn't enter 1 or 2


The script I use to start as a kiosk:
odroid@server:~$ cat headless.sh
xrdb -merge $HOME/.Xresourcesii &
xrandr --output HDMI-1 --panning 0x0+0+0 --fb 0x0 --rotate left &
xset s off && xset -dpms &
xfconf-query -c xsettings -l &
attract
Translating into english,
  • attach fonts and whatnot I might set from the Window Manager
  • rotate the display left, resetting the pan and framebuffer, and output to HDMI-1
  • turn off screen saver and power management (I use Attract's screen saver)
  • dump out my settings and run attract

1Up Arcade Mod: Adding Video

Screwed onto the LCD is a small tin box. Inside this is the game board. (Interestingly, 1Up sands off the identifying information on the chips.) Detach the power and video cables from the 1Up board.

Installing the Video Board

Buy a video logic board to decode HDMI and sound for your ODROID. If you don't have an ODROID, and your single board has a mini stereo out, you can use that instead of the audio decoder on the video board. I got the video board below with the two EPROMS. You can discard this driver board as you don't need it (you just need the decoder and LCD driver card - the one with the HDMI or VGA inputs).
 

Note that you should try install this as low as possible on the front panel that the LCD is mounted to so the cables to the SBU and amplifier can be short. To avoid RF interference, you should not attach this video controller to the LCD. I did, because the cable was not long enough from the LCD - so I attached a wooden mount with hot glue.

I used 1/4" polyethelene tubing (125degF) as a spacer, cut to 1/4 sections, as finding spacers was (a PITA), its workable, and strong (like bone). Also, polyethelene is a very weak conductor of electricity (or restated its a good insulator).

My temperature gun tells me the video controll runs about 90 degF, so it does not need specific cooling, nor does it present a fire risk to the 1/2" wood mounting board..

Plugging It In

A decent short (18") HDMI cable can run from the video board to the SBC.


Attach the Audio

I don't like clutter and the longer the analog audio cable the more chance for noise, so I used an 18" stereo mini to RCA cable to connect to the amplifier. Plug this into the video logic board.

Thursday 4 May 2023

1Up Arcade Mod: Adding Speakers and Amplifier

The 1Up has a slat directly under the joystick panel on an angle. It is about 1/4" thick and its coated with some laminate and 460mm W by 180mm H. I measured out the speakers (80mm D), amplifier (100mm W 40mm H) and the old buttons from the PacMan (1" D about 28mm D). (Inspect the page if you want this template for your laser cutter. You will see a scale factor for mm to pt and the measurements are in mm. It's hand coded SVG.)
I went to the maker room at work and cut the board. The laser had issue with the laminate, so we had to run it 3 times.

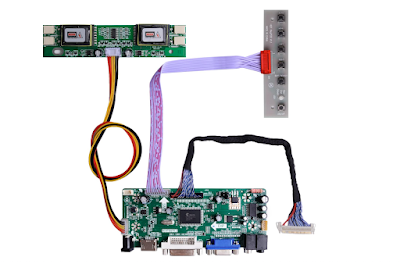
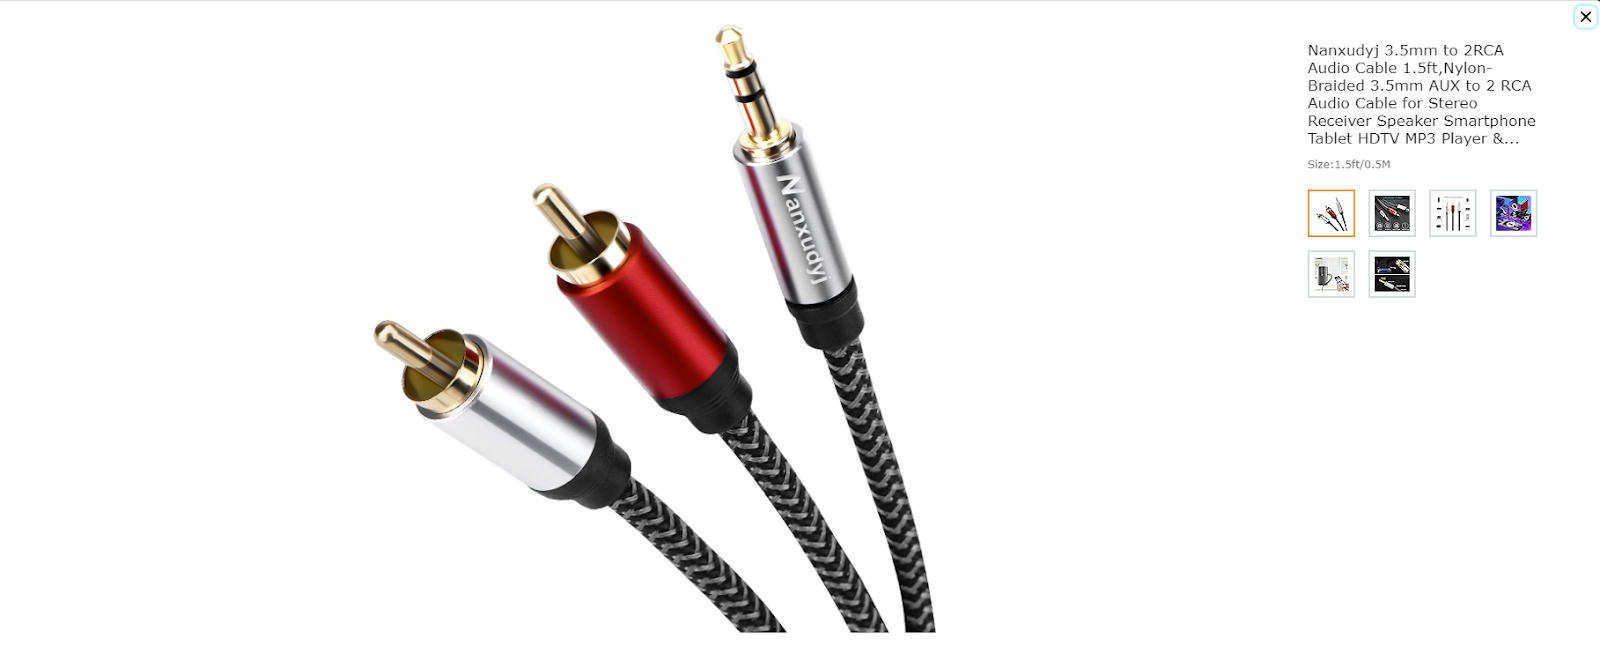
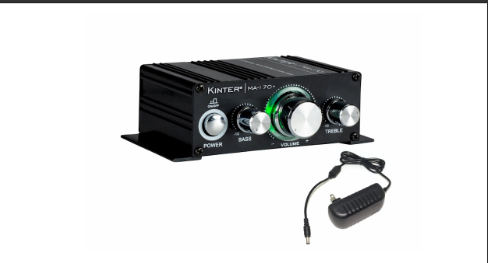
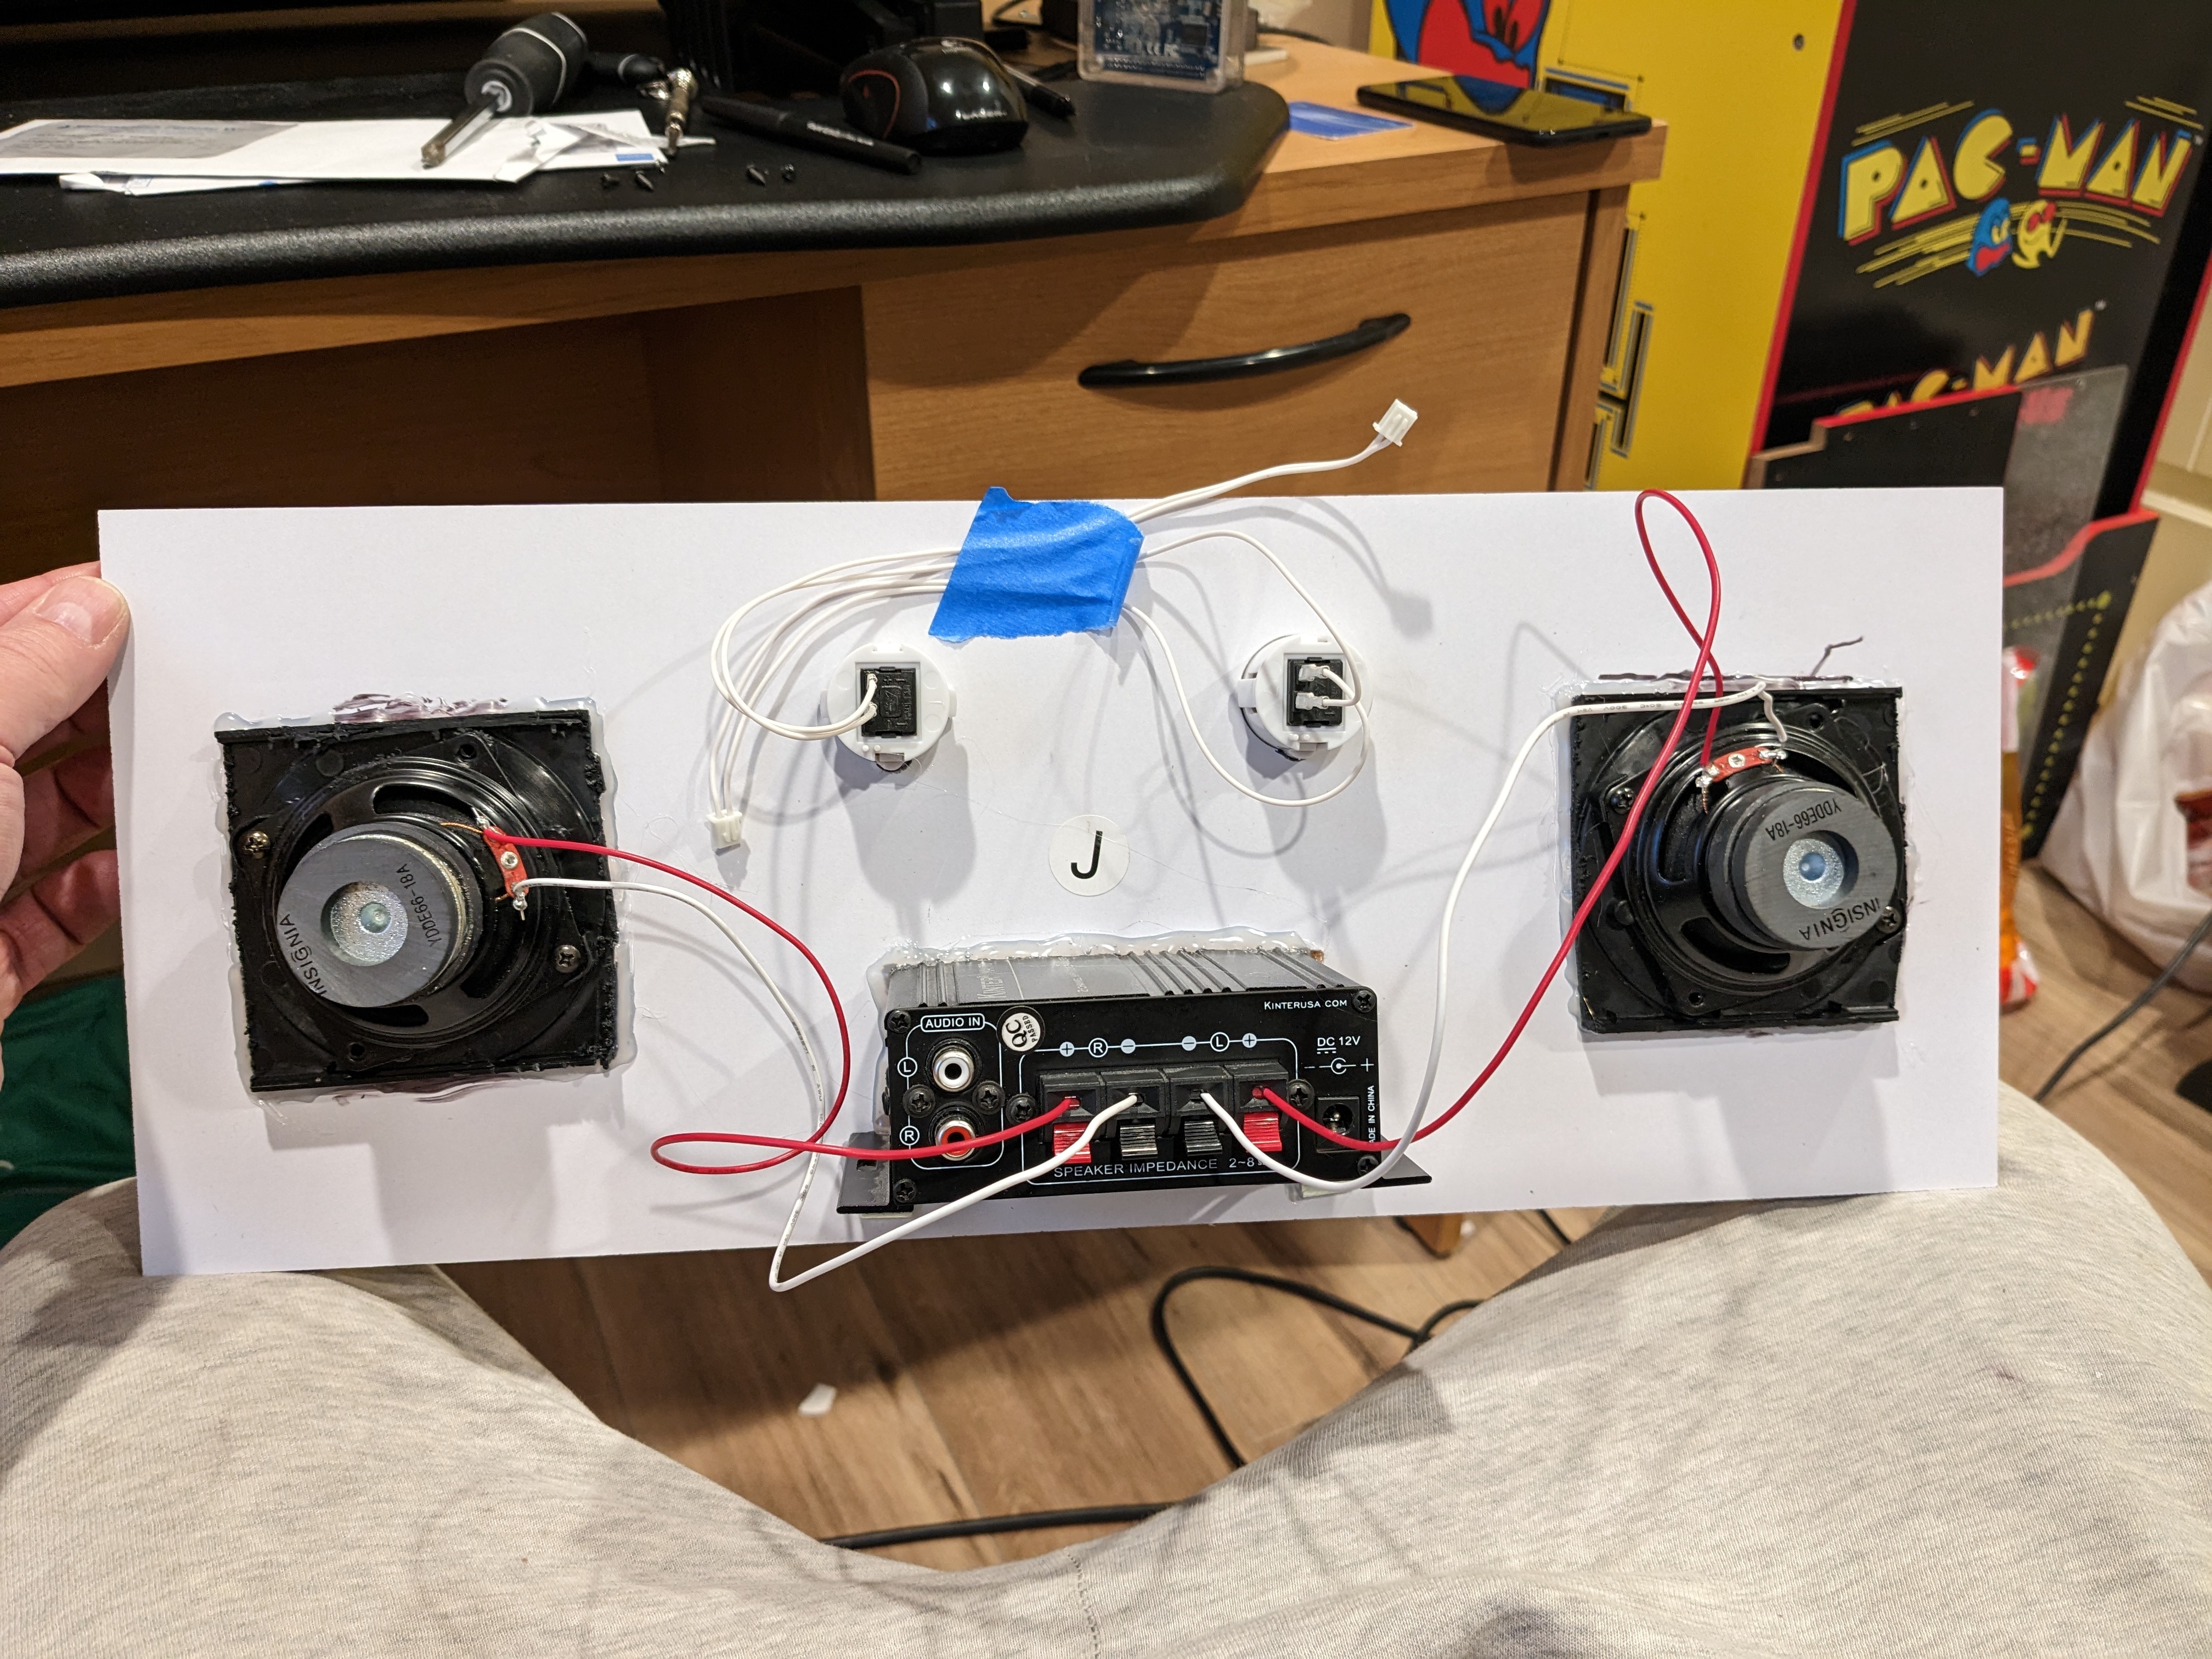
I like recycling, so I had an old Insignia NS-PCS40 pair of desktop speakers. I didn't find the speaker specifications, aside from it using a power adapter that output 12V and 700mA load. When we ripped the speakers appart (doh, screws behind the fabric), I found they were 4 Ohm 40 W. The amplifier I bought, the Kinter MA 170, would have no problem powering those...


So if you want an inexpensive set of speakers, you can try these


I debated using hot glue or expoxy. At least with hot glue, a heat gun can help fix a mistake. But expoxy is permanent, so I used hot glue.


The issue with the hot glue is it is not compressible. So I ended up with 1-2mm of gap between the speaker mount and the faceplate board. Here is the result

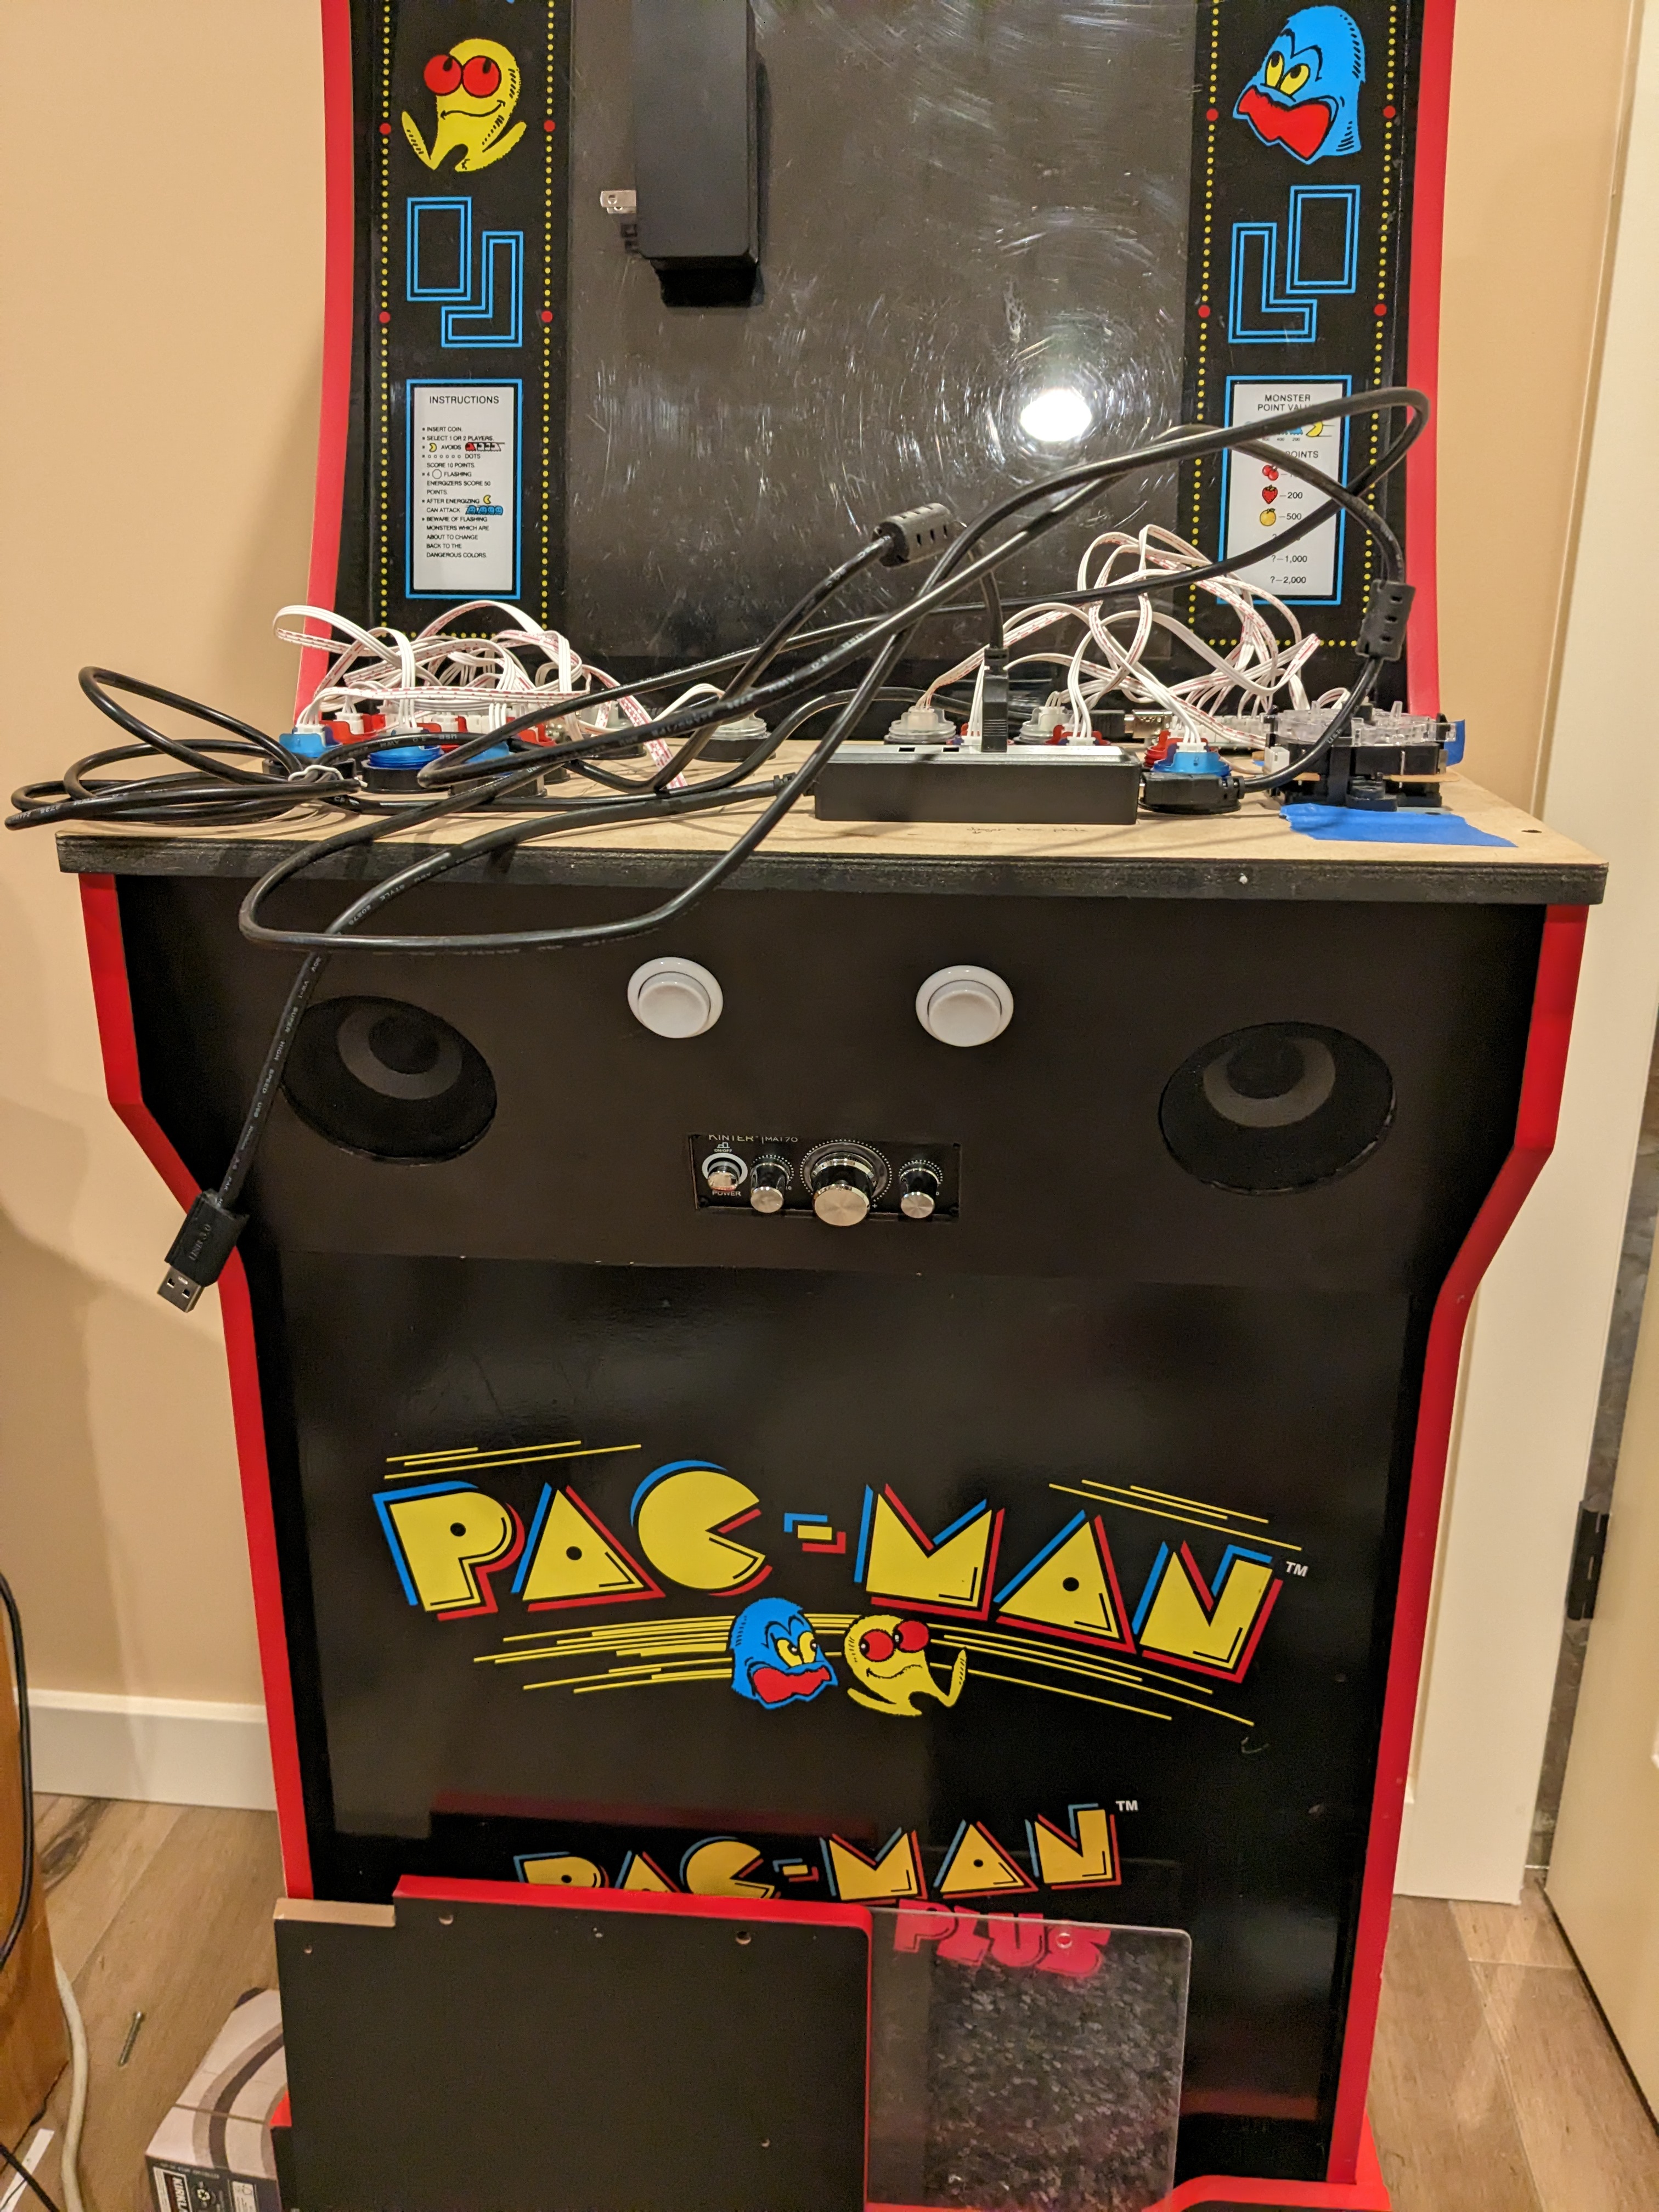
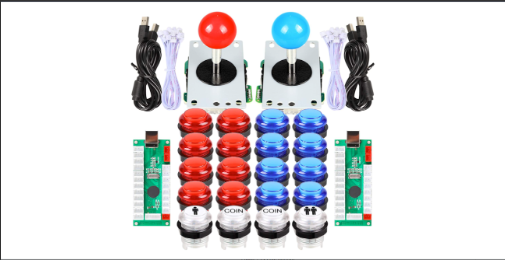
However, the final product was almost perfect. I just needed to use my dremmel to make notches for the arcade buttons. My plan for them is to connect them to the GPIO on the Odroid and use them for restart or shutdown. Almost - means that in hind sight I should lower the buttons by 3/4" because I miscalculated the USB hub position and height for when USB cables are plugged in! I was lucky in that I could position the cables around the button and still use the wiress network and keyboard adapters.

I added 1/2" angle brackets under the amplifier with hot glue to give it more stability. Again, hindsight tells me I should have raised the amplifier box by 1/4".


1Up Arcade Mod: Fixing the Sound

After assembling my cabinet, I noted a lot of feedback (noise, or humm) through the amp. I tried a few tricks to isolate the noise, but I am not done yet. Often this is caused by some circuit (bit of electronic equipment) being grounded, or slightly "out of phase" because they're on different power suppies - though everything I have is grounded and on the same power supply.
  • changed/shortened the audio cable from the video card to the amp
  • change the position of the power cables and power supply
This did not work. So I ordered some ferrit clips and this "Ground Loop Noise Isolator" from Amazon.


It absolutely eliminated the hum! But it also cuts the high and low frequencies, so the sound is a bit muffled. However, until I can really isolate the noise, it is very livable.
 
Originally I had an unshielded stereo mini to RCA cable that was 3 ft. Way too much cable and I want a tidy cabinet - and limit noise. I replaced it with a shielded 1.5 ft cable - so I have less clutter but it was not the source of the hum.