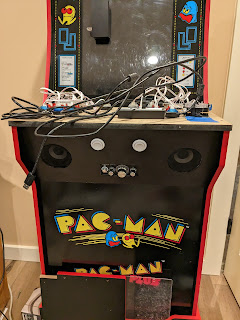
Monday 18 December 2023

MAME: Getting Things Working

Its frustrating when the games you love don't work.
  • Moon Cresta and Galaxian crash on ARM because of a threading glitch (possibly in discrete.cpp), with an "negative samples" exception because the threads to generate the sound go out of order
  • Tekken 1 and 2 play no sound, and the coin button doesn't work
  • Vector games look like crap (asteroid, star wars, etc.)

Multithreading Issues

When I turned off optimization, and turned on debugging, the threading issue did not manifest. Its hard to debug. I tried to ask Bard what was up with the code, and it suggested std::launder on the pointers, that only masked the issue. Then "chuckie_the_egg" on Reddit suggested something brilliant: Set the number of processors to one or two and the problem likely won't happen. And Chuckie was right. 48 hours, even with mame's debug on, and no crashing. So, in your .mame folder, create a mooncrst.ini and galaxian.ini and add numprocessors 2.

Compiling for Aarch64

Chuckie also pointed out that he compiles with -fsigned-char on as this is a key difference between ARM and Intel (gcc vs mscode). I got to thinking, maybe this, and the odd behaviors I was experiencing on games like Tekken are due to this. Decades ago I wrote a uLaw to PCM converter. I know the old Sun Microsystems machines used signed bytes to represent the signed 8 bit audio. Maybe I should care about tuning MAME for the ODroid N2L too. In the makefile: ARCHOPTS = -fsigned-char -mtune=cortex-a73.cortex-a53 -march=armv8-a Wonderful, Tekken 1 and 2 both started working with sound. (Soul Edge does not, so I need to figure out why as it does on Intel.)

Vector

This is posted in many places, but vector games at high resolutions lose points and have weak lines. To fix all vector games, created a vector.ini and put this in as it will make points and lines bigger and brighter:
beam_width_min 1.5
beam_width_max 1.5
beam_dot_size 1.5
beam_intensity_weight 1.0

Sunday 16 July 2023

Geekom Mini-Air 11

Pregame Show

I thought this would be a good gaming alternative - unlike SBCs this is a mini computer so has all the I/O ports you need, SD card reader, and expandable SSD and DRAM slots inside. This machine has built in wireless, JasperLake GPU, and 4 core Celeron M5105 @ 2GHz. It does run hot though; and takes 19V 3.42A 65W power (like some Chromebooks). I zapped it with my temp gun, and its 110F (43C), and its "rated" for 50C - with NO load.

WSL2 Failure

I tried to use WSL2 server, and after a couple hours gave up, as it seems set for Wayland not X11. It would be more useful if you could install Xubuntu; maybe you can but I gave up. (Linux support is something Chromebook does right.)

Windows 11 Must Die

I installed MAME and other tools and they stuttered. This can't be right, I thought. So given my WSL failure, and that I had to hunt down some older directX kits to get anything working, I said to heck with it - I must install Ubuntu 22 and benchmark with somewhat more apples to apples.

Installing Ubuntu Pains

Yes, you hit del to enter BIOS and set the startup device. Using EFI, I had to set to boot from "USB KEY". I had to blow away /dev/sda2 and other Windowsy partitions. I had to reformat the partition in ext4... and it seems the drivers on Xubuntu 22.04 image are not fully compatible with the Air Mini. (The RealTek 8821c driver continue to blow kernel errors, frame errors, and hung several times during install.) After several attempts, and update/upgrades, I managed to get Xubuntu installed and up-to-date/stable. I really don't know why Geekom doesn't have a working image, or sell the devices without Windows...

Quelle Surprise

Even though it only has 4 cores, the rendering capability of the device is solid.
  • geekom-miniair-11: 1378 ($150)
  • opi5: 975 ($110)
  • odroid n2l: 509 ($70)
So graphics from JSL makes this device 2.7x faster than my N2L, and 1.4x faster than the OPi5 (note not all benches were faster). But, sound emulation is multi-threaded and runs on multiple cores, so the next benches will be more interesting... yay symetric multi-processing.
# uname -a
Linux geekom-MiniAir-11 5.19.0-46-generic #47~22.04.1-Ubuntu SMP PREEMPT_DYNAMIC
# glmark2
=======================================================
    glmark2 2021.02
=======================================================
    OpenGL Information
    GL_VENDOR:     Intel
    GL_RENDERER:   Mesa Intel(R) UHD Graphics (JSL)
    GL_VERSION:    4.6 (Compatibility Profile) Mesa 22.2.5-0ubuntu0.1~22.04.3
=======================================================
[build] use-vbo=false: FPS: 1702 FrameTime: 0.588 ms
[build] use-vbo=true: FPS: 2127 FrameTime: 0.470 ms
[texture] texture-filter=nearest: FPS: 1929 FrameTime: 0.518 ms
[texture] texture-filter=linear: FPS: 1898 FrameTime: 0.527 ms
[texture] texture-filter=mipmap: FPS: 1891 FrameTime: 0.529 ms
[shading] shading=gouraud: FPS: 1753 FrameTime: 0.570 ms
[shading] shading=blinn-phong-inf: FPS: 1759 FrameTime: 0.569 ms
[shading] shading=phong: FPS: 1707 FrameTime: 0.586 ms
[shading] shading=cel: FPS: 1689 FrameTime: 0.592 ms
[bump] bump-render=high-poly: FPS: 1272 FrameTime: 0.786 ms
[bump] bump-render=normals: FPS: 2039 FrameTime: 0.490 ms
[bump] bump-render=height: FPS: 2022 FrameTime: 0.495 ms
[effect2d] kernel=0,1,0;1,-4,1;0,1,0;: FPS: 1445 FrameTime: 0.692 ms
[effect2d] kernel=1,1,1,1,1;1,1,1,1,1;1,1,1,1,1;: FPS: 912 FrameTime: 1.096 ms
[pulsar] light=false:quads=5:texture=false: FPS: 1696 FrameTime: 0.590 ms
[desktop] blur-radius=5:effect=blur:passes=1:separable=true:windows=4: FPS: 759 FrameTime: 1.318 ms
[desktop] effect=shadow:windows=4: FPS: 1125 FrameTime: 0.889 ms
[buffer] columns=200:interleave=false:update-dispersion=0.9:update-fraction=0.5:update-method=map: FPS: 364 FrameTime: 2.747 ms
[buffer] columns=200:interleave=false:update-dispersion=0.9:update-fraction=0.5:update-method=subdata: FPS: 647 FrameTime: 1.546 ms
[buffer] columns=200:interleave=true:update-dispersion=0.9:update-fraction=0.5:update-method=map: FPS: 354 FrameTime: 2.825 ms
[ideas] speed=duration: FPS: 1624 FrameTime: 0.616 ms
[jellyfish] : FPS: 1232 FrameTime: 0.812 ms
[terrain] : FPS: 193 FrameTime: 5.181 ms
[shadow] : FPS: 562 FrameTime: 1.779 ms
[refract] : FPS: 326 FrameTime: 3.067 ms
[conditionals] fragment-steps=0:vertex-steps=0: FPS: 1541 FrameTime: 0.649 ms
[conditionals] fragment-steps=5:vertex-steps=0: FPS: 1547 FrameTime: 0.646 ms
[conditionals] fragment-steps=0:vertex-steps=5: FPS: 1545 FrameTime: 0.647 ms
[function] fragment-complexity=low:fragment-steps=5: FPS: 1534 FrameTime: 0.652 ms
[function] fragment-complexity=medium:fragment-steps=5: FPS: 1534 FrameTime: 0.652 ms
[loop] fragment-loop=false:fragment-steps=5:vertex-steps=5: FPS: 1578 FrameTime: 0.634 ms
[loop] fragment-steps=5:fragment-uniform=false:vertex-steps=5: FPS: 1597 FrameTime: 0.626 ms
[loop] fragment-steps=5:fragment-uniform=true:vertex-steps=5: FPS: 1595 FrameTime: 0.627 ms
=======================================================
                                  glmark2 Score: 1378 
=======================================================

Saturday 15 July 2023

Orange Pi 5 vs Odroid N2L

Well, on average the OPi5 is twice faster than the N2L. So, though the Odroid community is nice and supportive (where the OPi community is pretty silent), the OPi has clear performance advantages for retro gaming.

Rockchip RK3588S | 8-core 64-bit processor | Big.Little Architecture: 4xCortex-A76 and 4xCortex-A55, Big core cluster is 2.4GHz, and Little core cluster is 1.8GHz frequency. | Arm Mali-G610 MP4 “Odin” GPU Amlogic S922X Processor (12nm) | Quad-core Cortex-A73(2.2Ghz) and Dual-core Cortex-A53(2Ghz) | ARMv8-A architecture with Neon and Crypto extensions | Mali-G52 GPU with 6 x Execution Engines (800Mhz)
Linux orangepi5 5.10.110-rockchip-rk3588 #1.1.6 SMP | Orange Pi 1.1.6 Jammy | 22.04.2 LTS (Jammy Jellyfish) Linux server 5.15.0-odroid-arm64 #1 SMP PREEMPT Ubuntu 5.15.118-202306231801~jammy (2023-06-23) | Ubuntu 22.04.2 LTS | 22.04.2 LTS (Jammy Jellyfish)
glmark2 2021.02 | glmark2 Score:
opi5 975 odroid n2l 509
OpenGL Information
GL_VENDOR:
Panfrost Mesa
GL_RENDERER:
Mali-G610 (Panfrost) Mali-G52 (Panfrost)
GL_VERSION:
3.0 Mesa 23.0.0-devel 3.1 Mesa 23.2.0-devel (git-68735f4e86)
FPSFrame TimeFPSFrame TimeRatio
[build] use-vbo=false 1005 0.995 532 1.880 1.89
[build] use-vbo=true 1258 0.795 658 1.520 1.91
[texture] texture-filter=nearest 1169 0.855 678 1.475 1.72
[texture] texture-filter=linear 1200 0.833 672 1.488 1.79
[texture] texture-filter=mipmap 1167 0.857 688 1.453 1.70
[shading] shading=gouraud 1172 0.853 555 1.802 2.11
[shading] shading=blinn-phong-inf 1156 0.865 554 1.805 2.09
[shading] shading=phong 1112 0.899 498 2.008 2.23
[shading] shading=cel 1156 0.865 494 2.024 2.34
[bump] bump-render=high-poly 917 1.091340 2.941 2.70
[bump] bump-render=normals 1251 0.799 761 1.314 1.64
[bump] bump-render=height 1269 0.788 768 1.302 1.65
[effect2d] kernel=0,1,0;1,-4,1;0,1,0; 1103 0.907 534 1.873 2.07
[effect2d] kernel=1,1,1,1,1;1,1,1,1,1;1,1,1,1,1; 854 1.171 228 4.386 3.75
[pulsar] light=false 1182 0.846 722 1.385 1.64
[desktop] blur-radius=5 362 2.762 215 4.651 1.68
[desktop] effect=shadow 926 1.080 592 1.689 1.56
[buffer] columns=200 455 2.198 199 5.025 2.29
[buffer] columns=200 421 2.375 197 5.076 2.14
[buffer] columns=200 538 1.859 229 4.367 2.35
[ideas] speed=duration 1035 0.966 376 2.660 2.75
[jellyfish] default 1011 0.989 446 2.2422.27
[terrain] default 71 14.085 44 22.727 1.61
[shadow] default 909 1.100 351 2.849 2.59
[refract] default 312 3.205 97 10.309 3.22
[conditionals] fragment-steps=0 1168 0.856 680 1.471 1.72
[conditionals] fragment-steps=5 1134 0.882 670 1.493 1.69
[conditionals] fragment-steps=0 1148 0.871 675 1.481 1.70
[function] fragment-complexity=low 1137 0.880 663 1.508 1.71
[function] fragment-complexity=medium 1148 0.871 676 1.479 1.70
[loop] fragment-loop=false 1155 0.866 659 1.517 1.75
[loop] fragment-steps=5 1149 0.870 685 1.460 1.68
[loop] fragment-steps=5 1147 0.872 664 1.506 1.73

Friday 14 July 2023

Orange Pi 5...

So I picked up an Orange Pi 5. I am writing this blog with it. "Orange Pi 5 uses Rockchip RK3588S new generation 8-core 64-bit processor, quad-core A76+quad-core A55, with 8nm process design, up to 2.4GHz main frequency, integrated ARM Mali-G610 GPU, embedded high-performance 3D/2D image acceleration module, built-in NPU with 6Tops computing power." I snagged the 8G version as that is reasonable for game emulation. 

I was mildly disappointed in a couple things. 
  1. No emmmc memory But it does have an SSD slot. I snagged a fast 1T sdram so I am not concerned. 
  2. 5V/4A. That's right. 4A. Most of the USB C power supplies I have are 3A. I suspect 4A is a requirement when you have all the components attached (i.e. an SSD). So I am using a 3A, but will get a juicier power supply. 


I am a fan of Ubuntu, so I snagged the server image via the orangepi.org and https://github.com/Joshua-Riek/ubuntu-rockchip/releases/tag/v1.14.
I always snag the server image so I have less junk installed/to remove.

I then encounted the same pain-point with regard to wireless adapter support. My AE6000 wasn't supported but an older 2.4 RTL8188CUS was kicking around so I got connected after the usual battle with manually setting up netplan.
Then I installed xorg, xfce4, and chromium. X11 started without issue. 

But as soon as I installed mesa-utils and ran glmark2... What the hell do you mean software rendering? Where is my Mali-G610 driver?!
This resulted in much anger and finding little interesting on the web. But I did find some pointers...
sudo apt install mali-g610-firmware 
sudo add-apt-repository ppa:liujianfeng1994/panfork-mesa 
sudo apt update 
sudo apt upgrade 
 Thank you LiuJian you are a hero!

So now its off to run some benchmarks!

Monday 5 June 2023

1Up Arcade Mod: Demo of Kiosk FCEUX (NES)

The Demo of nothing more classic than Super Mario Bros (that I own the cart, a NES, two NES classics).

Using Ubuntu 22 with SDL2 Qt5, if I set full screen mode while using any window manager, I do get full screen. However, if I launch with only X11, the max window size is not set, and the position is unknown. This manifests as a non-resizable SDL window with the original pixel dimensions of the console. Changing/flipping the fullscreen mode does nothing, as you will not get a resize event without a window manager.

My fix in Qt ConsoleWindow.cpp is to ask SDL for its current device height and width (doesn't need a window id, because we don't have a valid one yet) and then set the origin and dimension to device extents. (This assumes we have one device.) If I am not fullscreen, I use whatever was previously saved in the config. Paste this code in the ./drivers/Qt/ConsoleWindow.cpp file over where it gets the window size from the config.

SDL_DisplayMode mode;
int err = SDL_GetCurrentDisplayMode(0,&mode);
g_config->getOption( "SDL.Fullscreen", &setFullScreen );
if( setFullScreen )
{
        xWinPos = 0;
        yWinPos = 0;
        xWinSize = mode.w;
        yWinSize = mode.h;
}
else {
        g_config->getOption( "SDL.WinPosX" , &xWinPos );
        g_config->getOption( "SDL.WinPosY" , &yWinPos );
        g_config->getOption( "SDL.WinSizeX", &xWinSize );
        g_config->getOption( "SDL.WinSizeY", &yWinSize );
}
        if ( (xWinSize >= 256) && (yWinSize >= 224) )
        ...
        

this allows me to directly launch fceux with startx

Tuesday 30 May 2023

1Up Arcade Mod: Powering the Cab

The ODROID is recommended 12V 2.5a. The LCD is recommended "same as 1Up power" that is 12V 2.0a. The amp is also 12V 3.0a. However, having multiple transformers (power adapters) just creates heat and cabling mess. Putting in an industrial rectifier is more my style, but not so simple, and I don't need different voltages. And, I learned the hard way, that the amplifier draws more than 2 amps, and the ODROIOD can't satisfy a wifi nub, remote keyboard nub, the 4 port mini hub, and the two joystick/button decoders that in turn power .5 amp worth of button LEDs. I figured I was about 2 amps short of power.


very close to what I had, and I didn't have luck with the independant powered hubs
I replaced the 3' USB A - USB B cables with 1' versions.
So, I found a 12V 10a power supply typically used in home security systems, and a 3 way splitter. I re-used the extension cable for the 1Up. Plenty of juice.


And here is the finished, powered cabinet in use.

Monday 29 May 2023

1Up Arcade Mod: Displays, MAME and X11 Linux

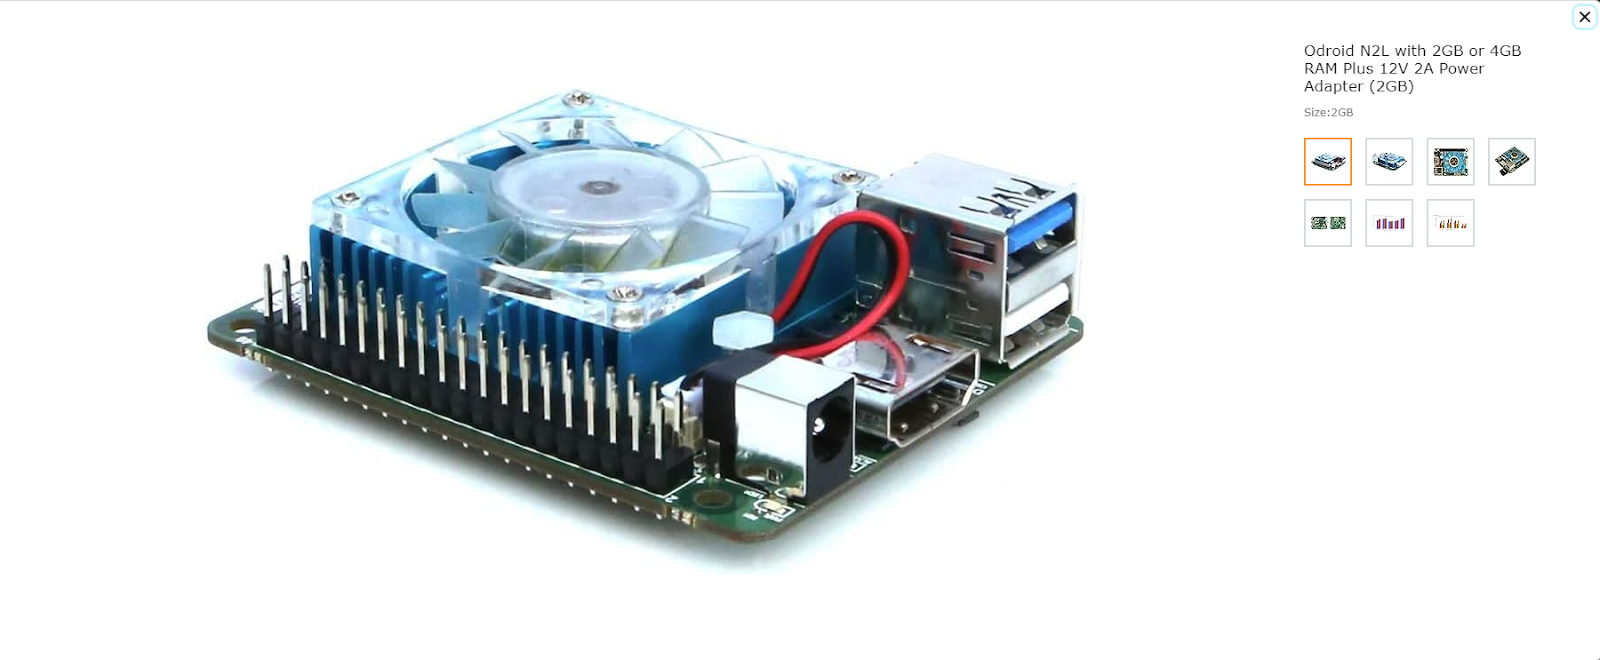
ODROID

I use a 6 core 4G ODROID, with 128G EMMC and 128G SD storage, because its pretty zippy.

Getting the Right Ubuntu

You don't need nor want a lot of Operating System or Windowing overhead if you just want gaming emulation. It makes sense that you want to squeeze every cycle out of your CPU, and not waste them on over-processing. So, because the stock Ubuntu 22 runs on the 4.9 Kernel on ODROID, we have a problem: the Mali GPU driver isn't supported for OpenGL. We need 5.* or later and the Bifrost video drivers. And we want a minimal Window manager - in fact we want a server build (no X11) to start with and only install the minimum amount of XWindows to save on space (and time). And, you really want to use the GPU - not just the framebuffer and software rendering (that is ... slow).

Fortunately, to_better has these linux builds for ODROID. http://docs.linuxfactory.or.kr/ has lots of great advice and images for a server tuned Ubuntu on ODROID. You can grab ubuntu-22.04-server-odroidn2l, and use Etcher on Windows or Linux to write the image to SD CARD or EMMC.
odroid@server:~$ uname -a
Linux server 5.15.0-odroid-arm64 #1 SMP PREEMPT Ubuntu 5.15.110-202305030140~jammy (2023-05-02) aarch64 aarch64 aarch64 GNU/Linux
I wanted a fast disk, so I got the EMMC card from ODROID, but I needed to blast the new image with this cool little adapter:
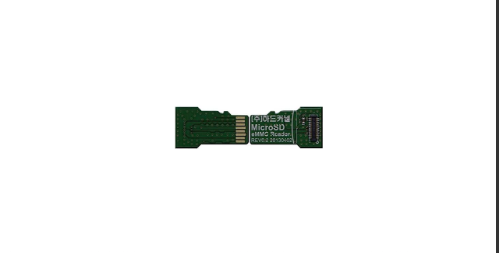
Note I nerfed my boot EMMC several times, and it is possible to hack the /boot boot.scr file to swap the devno to bootstrap from the EMMC but launch from the SD card. But this is another story... and its easier just to get the EMMC adapter to flash new images / edit files.

Updating the Linux Kernel to Support Rotate

I face a challenge in that the PacMan display is portrait (so height > width). Once I attached the video card, and booted, the world was sideways. Also, the video logic board is in Chinese, so there wasn't a "hardware" configuration change I could see. The folks at HardKernel fixed the kernel to support console rotation ( see the ODROID forum ) - you'd need to install this kernel if you want to rotate the frame buffer.

A Light Weight Window Manager

Once you have your Linux, you can install a light weight Window manager to make life easier should you choose - like I do - to be more than a kiosk. xfce4 should install what you need for bare bones X11.
sudo apt install xserver-xorg-core xfce4
If you just want a kiosk, then some suggest openbox or ratpoison.
The next step is telling X11 you want to be rotated too. After starting xfce4, open your display settings, and select left under rotation. This should stay rotated, but I think there is a glitch somewhere that when screen savers or power savers kick in, the screen will rotate back. It is an issue with xfce4 / window manager as I don't have this issue when I run as a kiosk (described later.)

Building the Emulator Front End and Emulators

Getting into the details of building tools is not here - there are many pages that instruct folks how to build the tools you use. Remember to move your compiled code to a place like /usr/games after executables are compiled. Also, the config files for both MAME and Attract will be in your $HOME directory (as whatever user you work under). Don't run X11 or the these applications as root (but you likely should build them as root.)

You should make sure you turn on swap before compiling and linking MAME, as 4G may not be enough to compile fully with optimization, so I recommend creating an 8G swap.
 sudo fallocate -l 8G /swapfile
 sudo chmod 600 /swapfile
 sudo mkswap /swapfile
 sudo swapon /swapfile
 sudo echo "/swapfile none swap sw 0 0" >> /etc/fstab


Attract

I used attract-2.6.2 aka Attract Mode as my front end because it is simple and easy to configure.

MAME

I used MAME 2.5.4 as my machine emulator. The documentation isn't great for Linux but you can get what you need to compile MAME. Note that MAME on X11 uses Simple DirectMedia Layer (SDL) for input, output, and the MESA OpenGL shim. My makefile turns on the following compile options:
NOWERROR = 1
OSD = sdl
SDLMAME_X11 = 1
OPTIMIZE = 2
TARGETOS = linux
that you can then use with a make -j6 to use all 6 cores (takes a few hours to compile full MAME.)

If you, like me, like to play and optimize code, MAME doesn't do a good job cleaning up after itself, so you will need to do this from the MAME source directory:
make clean
rm -rf `find . -name *.gch -print`
rm -rf `find . -name *.a -print`
  
to prevent "symbol not found" type errors if you fiddle with optimizations and headers.

Autostart to Kiosk, XFCE4 or Shell

There are several ways you can get linux to start an application instead of gettty terminal. I wanted to still log in, but after log in, auto run attract to be a kiosk. So, a .bash_profile is the trick to prompt what to do or timeout and just run attract!
odroid@server:~$ cat .bash_profile
read -t 10 -p "1) shell 2) xfce4 or do nothing and launch as kiosk: " v
if [[ $? -gt 128 ]] ; then
  startx ./headless.sh
else
  case "$v" in
    [1])
      ;; # dont exit as it will quit the shell
    [2])
      startxfce4;;
    *)
      echo "Huh?? I think you mean exit.";;
  esac
fi
This script does on of three things when the user logs in.
  • exit to console shell
  • start xfce4 as a Window Manager
  • just launch attract without a Window Manager under X11 if the user doesn't enter 1 or 2


The script I use to start as a kiosk:
odroid@server:~$ cat headless.sh
xrdb -merge $HOME/.Xresourcesii &
xrandr --output HDMI-1 --panning 0x0+0+0 --fb 0x0 --rotate left &
xset s off && xset -dpms &
xfconf-query -c xsettings -l &
attract
Translating into english,
  • attach fonts and whatnot I might set from the Window Manager
  • rotate the display left, resetting the pan and framebuffer, and output to HDMI-1
  • turn off screen saver and power management (I use Attract's screen saver)
  • dump out my settings and run attract

1Up Arcade Mod: Adding Video

Screwed onto the LCD is a small tin box. Inside this is the game board. (Interestingly, 1Up sands off the identifying information on the chips.) Detach the power and video cables from the 1Up board.

Installing the Video Board

Buy a video logic board to decode HDMI and sound for your ODROID. If you don't have an ODROID, and your single board has a mini stereo out, you can use that instead of the audio decoder on the video board. I got the video board below with the two EPROMS. You can discard this driver board as you don't need it (you just need the decoder and LCD driver card - the one with the HDMI or VGA inputs).
 

Note that you should try install this as low as possible on the front panel that the LCD is mounted to so the cables to the SBU and amplifier can be short. To avoid RF interference, you should not attach this video controller to the LCD. I did, because the cable was not long enough from the LCD - so I attached a wooden mount with hot glue.

I used 1/4" polyethelene tubing (125degF) as a spacer, cut to 1/4 sections, as finding spacers was (a PITA), its workable, and strong (like bone). Also, polyethelene is a very weak conductor of electricity (or restated its a good insulator).

My temperature gun tells me the video controll runs about 90 degF, so it does not need specific cooling, nor does it present a fire risk to the 1/2" wood mounting board..

Plugging It In

A decent short (18") HDMI cable can run from the video board to the SBC.


Attach the Audio

I don't like clutter and the longer the analog audio cable the more chance for noise, so I used an 18" stereo mini to RCA cable to connect to the amplifier. Plug this into the video logic board.

Thursday 4 May 2023

1Up Arcade Mod: Adding Speakers and Amplifier

The 1Up has a slat directly under the joystick panel on an angle. It is about 1/4" thick and its coated with some laminate and 460mm W by 180mm H. I measured out the speakers (80mm D), amplifier (100mm W 40mm H) and the old buttons from the PacMan (1" D about 28mm D). (Inspect the page if you want this template for your laser cutter. You will see a scale factor for mm to pt and the measurements are in mm. It's hand coded SVG.)
I went to the maker room at work and cut the board. The laser had issue with the laminate, so we had to run it 3 times.

I like recycling, so I had an old Insignia NS-PCS40 pair of desktop speakers. I didn't find the speaker specifications, aside from it using a power adapter that output 12V and 700mA load. When we ripped the speakers appart (doh, screws behind the fabric), I found they were 4 Ohm 40 W. The amplifier I bought, the Kinter MA 170, would have no problem powering those...


So if you want an inexpensive set of speakers, you can try these


I debated using hot glue or expoxy. At least with hot glue, a heat gun can help fix a mistake. But expoxy is permanent, so I used hot glue.


The issue with the hot glue is it is not compressible. So I ended up with 1-2mm of gap between the speaker mount and the faceplate board. Here is the result

However, the final product was almost perfect. I just needed to use my dremmel to make notches for the arcade buttons. My plan for them is to connect them to the GPIO on the Odroid and use them for restart or shutdown. Almost - means that in hind sight I should lower the buttons by 3/4" because I miscalculated the USB hub position and height for when USB cables are plugged in! I was lucky in that I could position the cables around the button and still use the wiress network and keyboard adapters.

I added 1/2" angle brackets under the amplifier with hot glue to give it more stability. Again, hindsight tells me I should have raised the amplifier box by 1/4".


1Up Arcade Mod: Fixing the Sound

After assembling my cabinet, I noted a lot of feedback (noise, or humm) through the amp. I tried a few tricks to isolate the noise, but I am not done yet. Often this is caused by some circuit (bit of electronic equipment) being grounded, or slightly "out of phase" because they're on different power suppies - though everything I have is grounded and on the same power supply.
  • changed/shortened the audio cable from the video card to the amp
  • change the position of the power cables and power supply
This did not work. So I ordered some ferrit clips and this "Ground Loop Noise Isolator" from Amazon.


It absolutely eliminated the hum! But it also cuts the high and low frequencies, so the sound is a bit muffled. However, until I can really isolate the noise, it is very livable.
 
Originally I had an unshielded stereo mini to RCA cable that was 3 ft. Way too much cable and I want a tidy cabinet - and limit noise. I replaced it with a shielded 1.5 ft cable - so I have less clutter but it was not the source of the hum.


Friday 31 March 2023

Adventures in Chromebook Land

Today I was inspired to take apart my old chromebook that used crosh and crouton to get a feux linux.

  Breath - inspired me to find  where the write protect screw was and crack the machine to remove the screw to install linux a la  this way.

Mostly I am seriously annoyed that my single boards are so fragile when it comes to GPU support, wifi USB support, and pretty much I spend all my time configuring Ubuntu when all I want to do is build my arcade cabinet.